Create Atomic flow
1. Connection
1.1 Create token
Before we start, navigate to your gravity-cli then create and copy the token to your clipboard.
/gravity-cli token create --desc "lab atomic" --enabled true -s lab-gravity-nats:4222
💡 Info:
- token can prevent data redundancy
- See Gravity CLI for detailed command line instructions
- Contact us if you would like to have all the example .yaml files
1.2 Subscribe to a Data Product
In this section, we utilize Gravity Subscriber module to subscribe to data products.
- Connect to your Atomic IP with the port 32300
Example:
192.168.100.154:32300
- Drag the "Gravity Subscriber" in the panel on the left to workspace
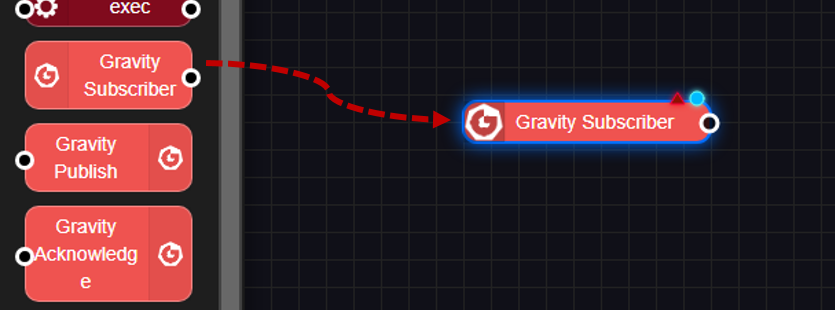
- Double click onto the module, to open the config window, paste the token, then click the pencil icon on the right.
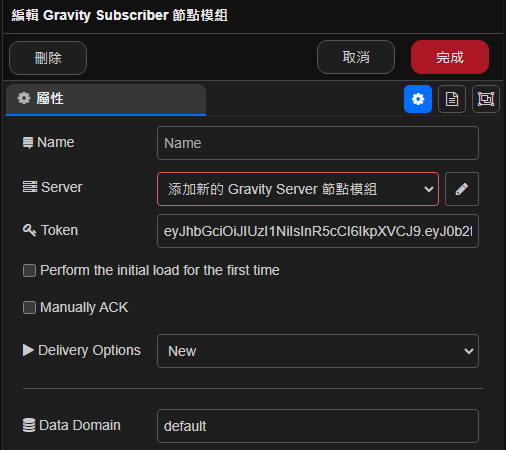
-
Fill in the "Server" Information
Server: lab-gravity-nats
Port: 4222
-
Go back to the previous page then on the
Productsection, select your DP, e.g.,misrc - misrc pd -
Upon finishing, go back to the workspace area and click onto the "deploy" button on the top right.
-
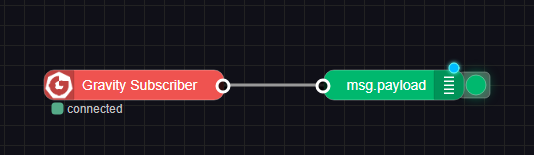
If successful, the subscriber module will appear to be "connect"

1.3 Debug Module*
📝 Note: The Debug module is capable of connecting to any module to inspect its log.
In continuation of the previous example, drag the debug module from the left panel to the workspace area.
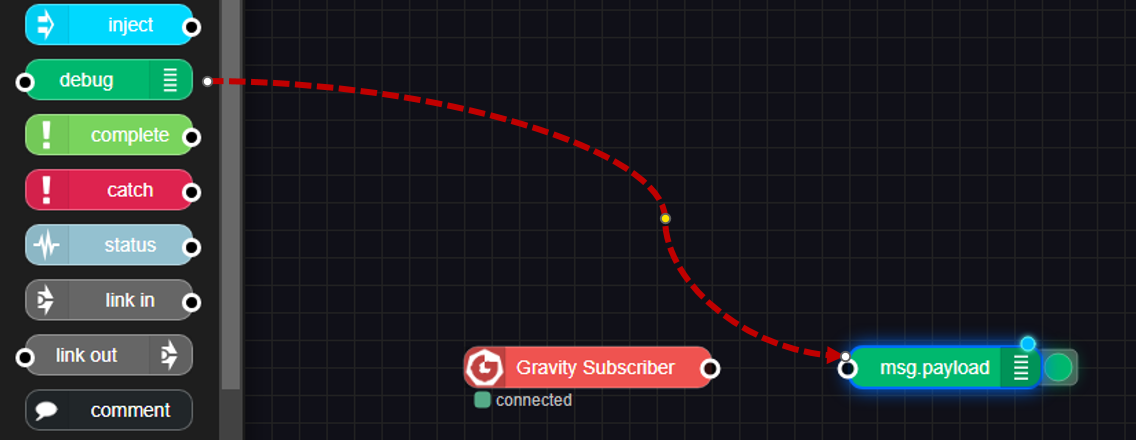
Connect the two by draggin on the little dot on the module.
The tiny blue dot on the debug module will disappear once you click on the deploy button.
Next, click onto the little bug button to switch to the debug panel.
此時若對來源資料庫進行 新增/更新/刪除 的操作,就可立即從”除錯視窗”中看到收進來的 CDC 事件:
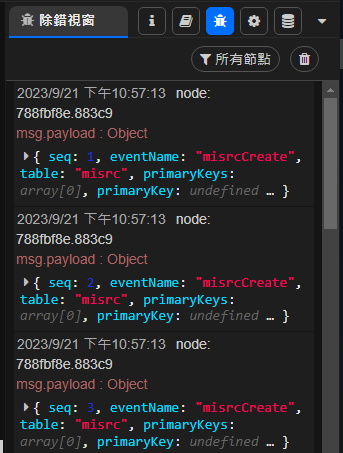
若展開每一個事件,就可以檢查 CDC 收進來的資料內容:

Atomic 模組與 Atomic flow 狀態儲存
若接續前例��,此時可按下右上角的 ”Publish” 按鈕,就可將前面所設計的 Atomic flow 內容推送到 Gitea 的 repository 中:
若此時到 Gitea 檢查 repository,就可發現其中有幾個檔案是剛剛被 atomic 更新的:
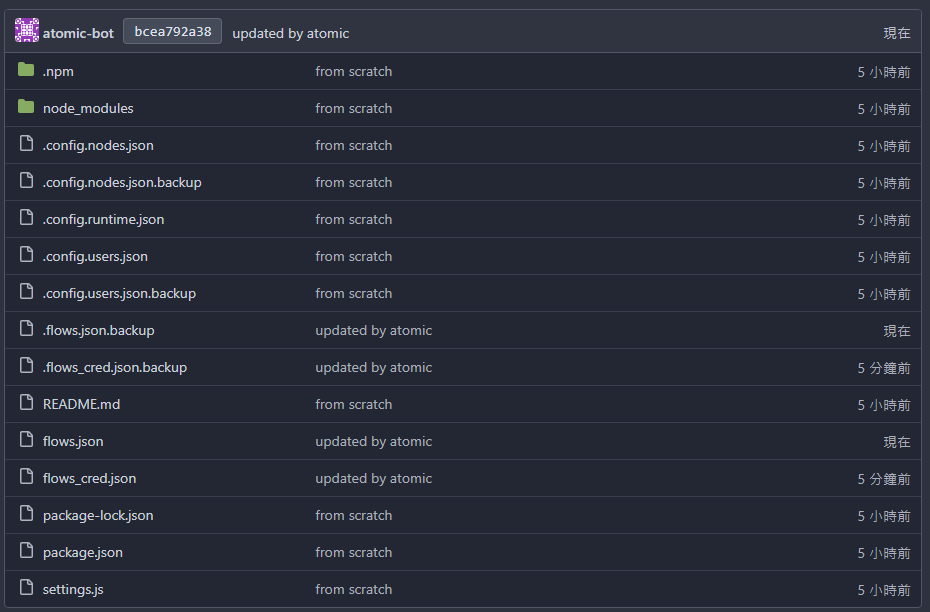
此時即完成初步 CDC 資料對接設定。
資料處理
事件分類:switch 模組
📝 Note:
switch模組可針對資料流中的欄位屬性進行分類以供後續邏輯處理
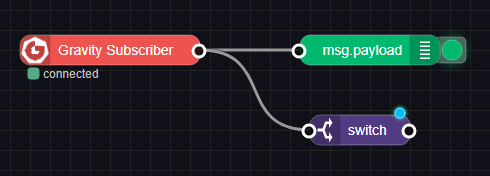
從左側欄位拖拉一個 “switch“ 模組至 Subscriber 右邊:
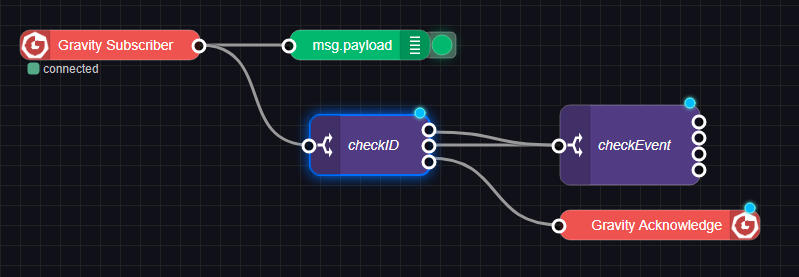
接下來可以點開它進行編輯 (假設命名為 checkID)。屬性欄位須填入欲處理的欄位名稱,例如,欄位名稱為 payload.record.bdl_id。接著新增判斷條件;例如,按編輯對話框左下方的“新增”兩次,並將最後一個設定爲“除此以外”:
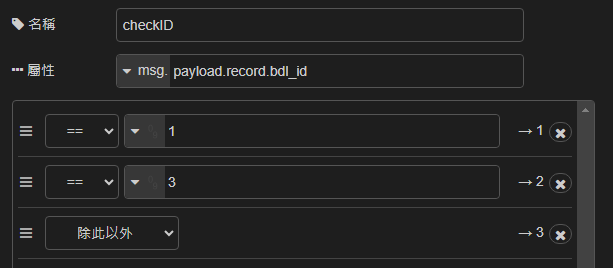
接著輸入條件;例如,從下拉選單中選擇 '數�字' 型別,並分別設定爲 1 與 3:
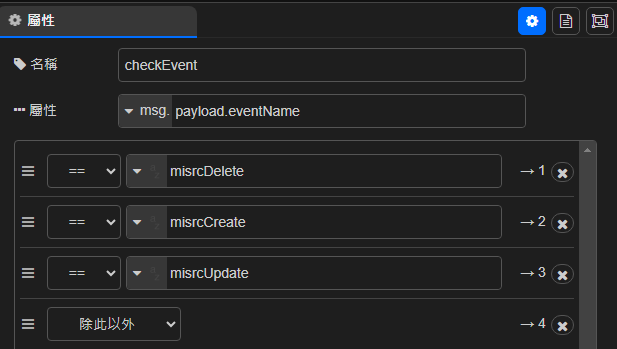
以下再以 event 判斷為例。此時可再多拉一個 switch 模組放於其右,例如編輯命名為 checkEvent,再自行輸入 event 名稱如下圖:
接下來,再拉一個 ”Gravity Acknowledge” 模組放在下方,並將各節點進行連線:
事件欄位變更:change 模組
📝 Note:
change模組可對資料流中的屬性欄位做加工, 包含設定、更改、移除、轉移。
接續前例,拉四個 ”change” 模組放在最右邊,分別命名並連線:
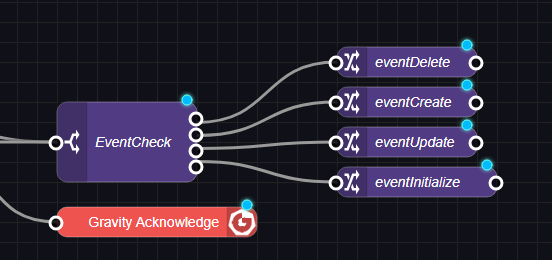
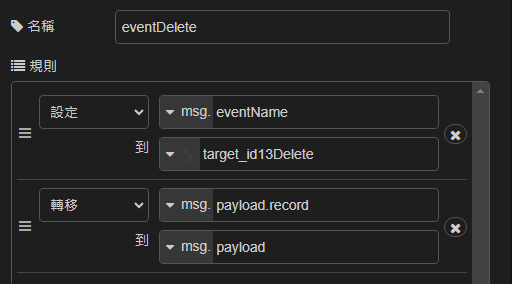
本例中,四個節點名稱分別為:eventDelete、eventCreate、eventUpdate、eventInitialize。編輯各節點,設定 ”eventName” 分別為:target_id13Delete、target_id13Create、target_id13Update、target_id13Initialize。而 payload.record 轉移接設定為 payload。例如,eventDelete 的內容將呈現如下:
匯入模組邏輯處理
如果有些模組和其 Atomic flow 已在其他地方完成並匯出成一個模組檔,之後想將該檔匯入時,可透過如下流程完成。假設目前有個要匯入的模組檔案名稱為 logic.json,其中包含一個名為 Logic 的節點 (實為一個 Change 節點)。
📝 Note: 要匯入的檔案於安裝軟體中暫無提供, 但可根據當前需求來製作並匯入。 從”Publish”按鈕旁邊的”三條線”下拉選單中選擇”匯入”:
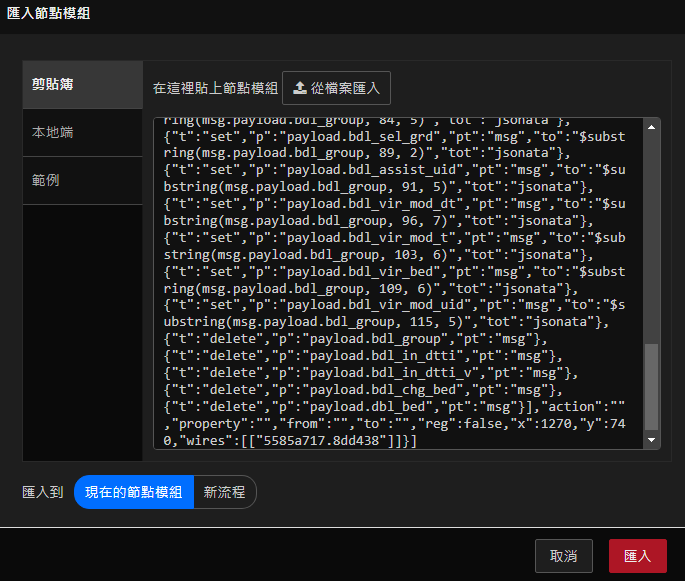
然後將 logic.json 檔案內容貼到匯入視窗中,並按下右下方的”匯入”按鈕:
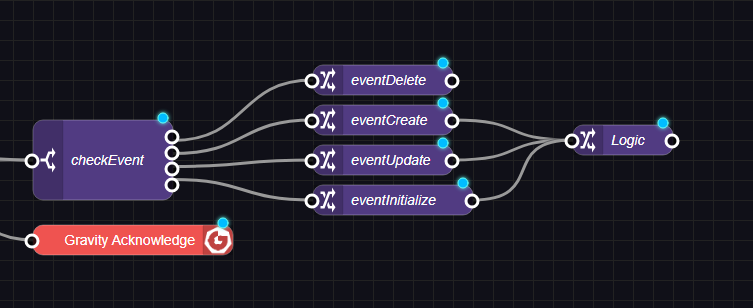
然後將 Logic 節點擺放到最右邊的位置並與左邊下面三個節點連線:
以上為匯入模組的程序。接下來我們將接續手冊使用的情境繼續加入其它模組。
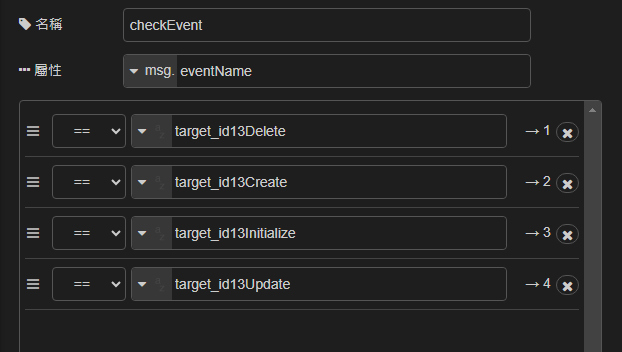
複製左邊 eventCheck 模組到 Logic 右邊 (使用 ctrl-c, crtl-v 即可完成此動作),並修改其內容如下。(其中 “屬性“ 指定修改 eventName)

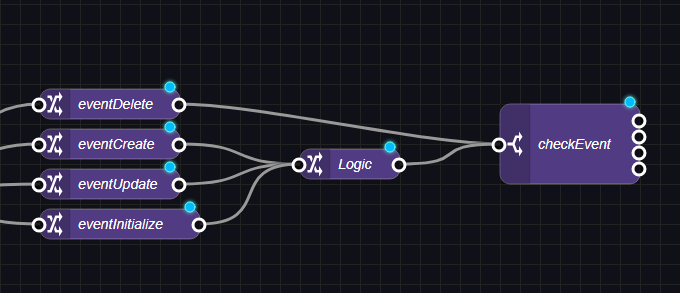
接著將 eventDelete 與 Logic 連接至本 checkEvent 節點:

目標資料庫寫入
當資料接入 Atomic 之後,就可以透過模組執行 SQL 命令將處理好的資料落地到相關的目標資料庫。不同的資料庫會有不同的模組及設定,變數處理方式也有所不同。本範例將以 MySQL 作為目標資料庫進行演示。
資料處理函數:function 模組
📝 Note
function模組能以 Javascript 程式碼來針對資料進行顆粒度更細微的處理,亦可對目標資料庫進行操作
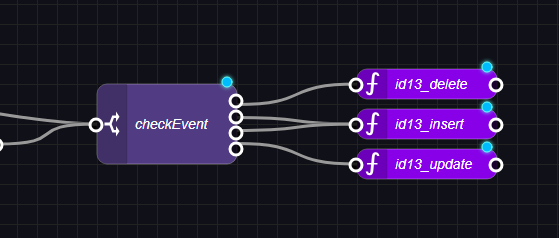
我們將於 checkEvent 節點後新增三個資料處理函數。
從左邊的模組表拉三個 function(函數) 模組到最右邊後並可於模組的函數內容標籤下方編輯區輸入程式 :
然後配置第一個函數,命名為 id13_delete並輸入函數內容,其內容如下:
函數內容:
var sql1 = "DELETE FROM target_id13";
var obj = msg.payload;
var pk=obj['gravity_pk']
msg.topic=sql1+" WHERE gravity_pk='"+pk+"';";
return msg;
第二個函數,命名為 id13_insert,內容如下:
函數內容:
var sql1 = "INSERT INTO target_id13 (";
var sql2 = ") VALUE ("
var obj = msg.payload;
var lastKey = Object.keys(obj).pop();
for(var key in obj) {
    var value = obj[key];
    switch (typeof value) {
        case "string":
            var parsedTime = Date.parse(value);
            if (!isNaN(parsedTime)) {
                value = value.replace("T", " ").replace("Z", "")
            }
            if (value != 'null') {
                sql1 = sql1 + key;
                sql2 = sql2 + "'" + value.replace("'","") + "'";
            } else {
                sql1 = sql1 + key;
                sql2 = sql2 + value;
            }

            break;
        case "number":
            sql1 = sql1 + key ;
            sql2 = sql2 + value ;
            break;
        default:
            sql1 = sql1 + key;
            sql2 = sql2  + value ;
            break;
    }
    if (key != lastKey){
        sql1=sql1 + ",";
        sql2=sql2 + ",";

    }else {
        sql2 =sql2 + ");";
    }

}
//node.warn(sql1 + sql2);
msg.topic=sql1 + sql2;
return msg;
第三個函數,命名為 id13_update,內容如下:
函數內容:
var sql1 = "UPDATE target_id13 SET ";
var obj = msg.payload;
var lastKey = Object.keys(obj).pop();
for(var key in obj) {
    var value = obj[key];
    switch (typeof value) {
        case "string":
            var parsedTime = Date.parse(value);
            if (!isNaN(parsedTime)) {
                value = value.replace("T", " ").replace("Z", "")
            }
            if (value != 'null') {
                sql1 = sql1 + key + "='" + value.replace("'","") + "'";
            } else {
                sql1 = sql1 + key + "=" + value;
            }

            break;
        case "number":
            sql1 = sql1 + key + "="  + value ;
            break;
        default:
            sql1 = sql1 + key + "=" + value;
            break;
    }
    if (sql1.slice(-1) != "," && key != lastKey){
        sql1=sql1 + ",";

    }

}
if (sql1.slice(-1) === ",") {
    sql1 = sql1.slice(0,-1);
}
var pk=obj['gravity_pk']
msg.topic=sql1+" WHERE gravity_pk='"+pk+"';";
return msg;
完成後,將函數與左邊的 checkEvent 進行連線:
設定 MySQL 模組
再下來,尋找並拖拉 ”mysql” 模組放到 function 模組右邊:
然後點開編輯 (命名為 ”targetDB”):
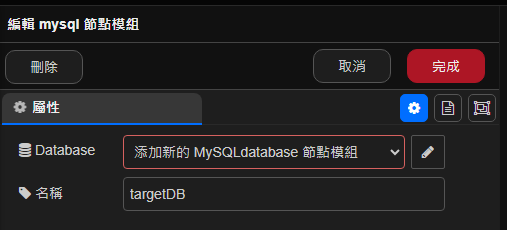
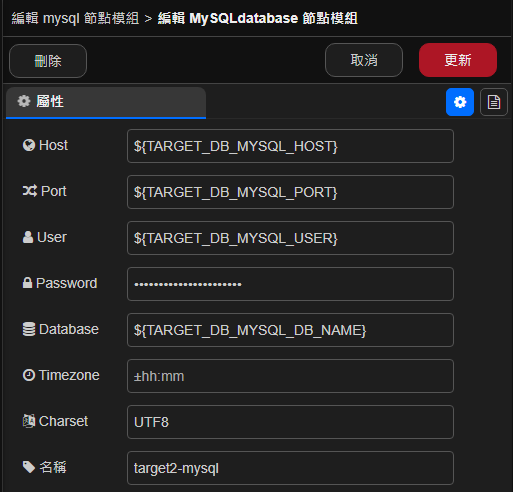
點選 Database 欄位右側的 ”鉛筆�” 圖標填寫資料庫連線資料:
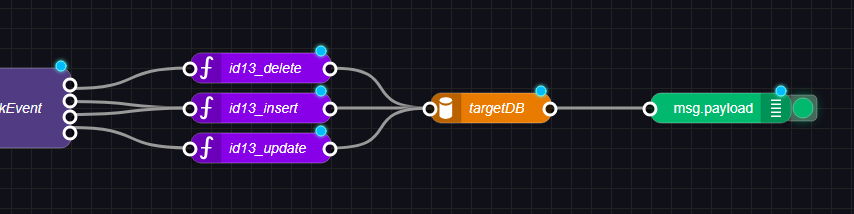
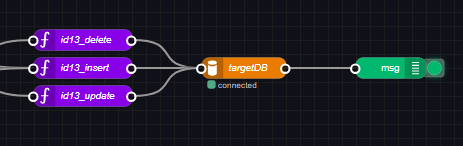
完成設定後,再拉一個”debug”模組到 mysql 模組後面,並完成相關連線:
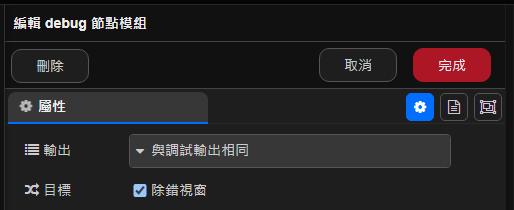
最後編輯 debug 模組 (調整輸出為 ”與調試輸出相同”):
Atomic 部署
當上面的模組依照本手冊的情境全部設定完成後, Atomic flow 配置畫面類似如下:

接著就可以按下視窗右上角的 部署 按鈕:
成功部署後,我們可以發現原本還沒生效的那些模組上的藍點全部都消失,同時我們也可觀察到 mysql 模組的連線狀態呈現為綠色 (connected):
接下來讓回到右側的除錯視窗,按一下右上方的 垃圾桶 圖標可將原本的 debug 訊息全部清除: